Summary
GibbsCAM 2026 adds Multiblade Edge Finishing, separate feedrate overrides for links and leads, feed control for leading- and trailing-edge extensions, and more Blade Finishing tool types. Use these controls with a saved baseline and complete simulation before approving production output.
Table of Contents
What Changed in GibbsCAM 2026
Important: A higher feedrate percentage is safe only when the affected motion is clear and behaves as expected. Verify the calculated path, complete machine motion, and posted feed values before production use.
Before You Begin
• Use GibbsCAM 2026 with the required 5-Axis and supported Multiblade capability.
• Save a copy of the part and retain the current Multiblade operations as a baseline.
• Define the blade, hub, shroud, edges, stock, fixtures, tool, and holder accurately.
• Confirm the final control labels and supported Blade Finishing tool types in the installed GibbsCAM build.
Procedure
Step 1 - Record the Baseline
1. Duplicate the affected Multiblade operation before changing it.
2. Record the selected geometry, tool assembly, allowances, tolerances, feeds, links, and estimated cycle time.
3. Calculate and simulate the baseline operation for comparison.
Step 2 - Add Edge Finishing
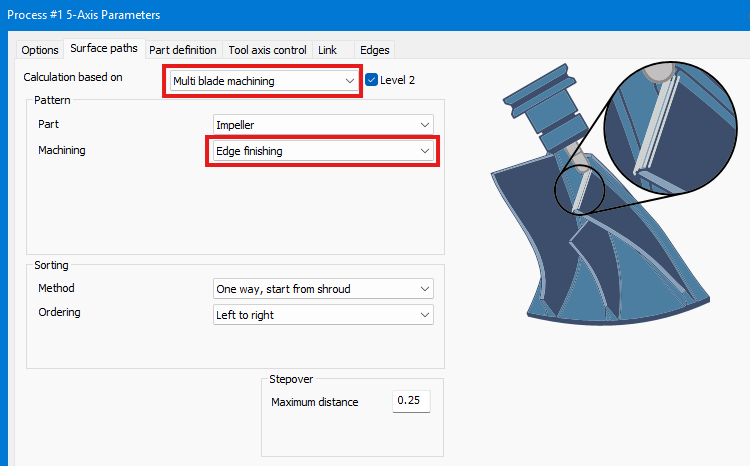
1. Open the 5-Axis operation and select Surface Paths > Calculation Based On > Multiblade Machining Pattern > Machining > Edge Finishing.
2. Select the required edge and supporting geometry, then calculate the operation.
3. Inspect the longitudinal pass for remaining-material removal, leading-edge protection, and surface quality.
Step 3 - Set Link and Lead Feedrates
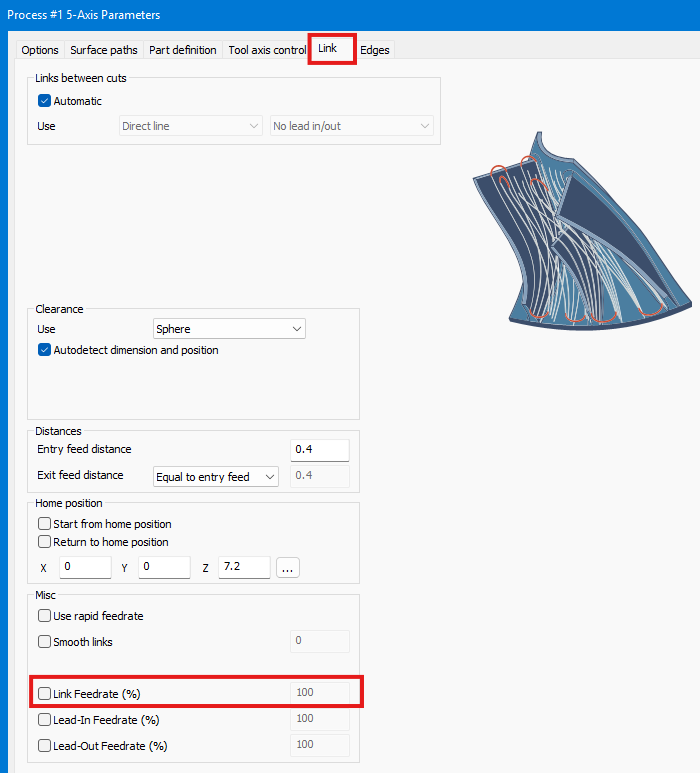
1. On the Link tab, set Link Feedrate (%) for the applicable non-cutting links.
2. Set Lead-in Feedrate (%) and Lead-out Feedrate (%) as percentages of the toolpath feedrate.
3. Regenerate and review each transition before increasing a value to reduce cycle time.
Step 4 - Set the Edge-Extension Feedrate
1. Locate Feedrate (%) for the leading- and trailing-edge extensions in the installed Blade Finishing controls.
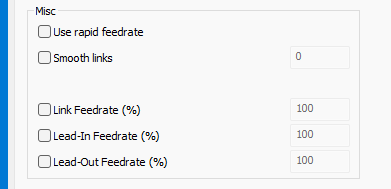
2. Confirm that each affected extension is non-cutting and has adequate clearance.
3. Set a conservative value, regenerate, and verify the transition and posted feed output.
Step 5 - Select a Blade Finishing Tool
1. Choose the supported ball, bullnose, end, or taper tool type required by the operation.
2. Define the cutting tool and holder completely, then recalculate the path.
3. Inspect tool contact, reach, holder clearance, remaining stock, and surface quality.
Step 6 - Validate the Result
1. Compare the revised operation with the saved baseline.
2. Run Op Simulation and Machine Simulation with the production stock, fixtures, tool, and holder.
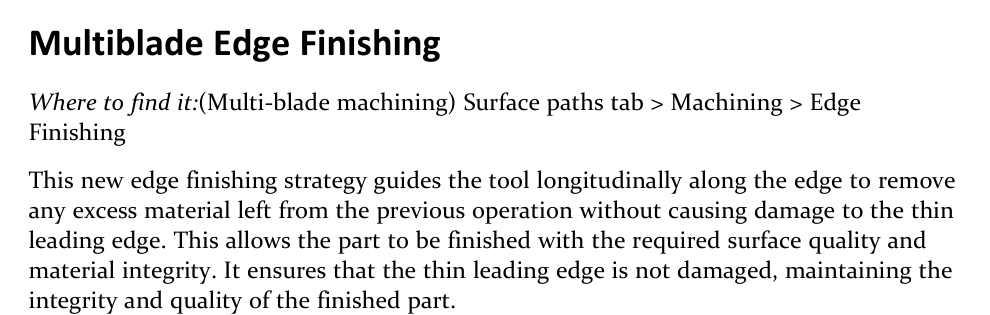
Figure 1 Use Edge Finishing to remove remaining edge material while protecting a thin leading edge
Source: What's New in GibbsCAM 2026, p. 38
3. Post with the approved postprocessor and review all transition motion and feed values before controlled prove-out.
Expected Result
• Edge Finishing removes remaining edge material without damaging the thin leading edge.
• Link, lead, and edge-extension moves use the reviewed feed values and remain clear.
• The selected Blade Finishing tool produces the required surface without tool or holder interference.
Best Practices
• Change one feed control at a time and compare the result with the saved baseline.
• Increase feed percentages only after confirming that the affected motion is non-cutting and clear.
• Recheck contact, reach, holder clearance, and stock whenever the Blade Finishing tool type changes.
• Verify posted feed values; the graphics result alone does not approve production output.
Troubleshooting
• Problem: Edge Finishing is unavailable.
Cause
• The installed build or licensed capability does not include the feature.
• The operation or selected geometry does not support Edge Finishing.
Resolution
Confirm GibbsCAM 2026, the required Multiblade capability, and supported blade and edge geometry. Contact CAMCO if the control remains unavailable.
• Problem: The leading edge is gouged or excess stock remains.
Cause
• The edge selection, tool, allowance, tolerance, or contact settings are incorrect.
• The preceding operation left inconsistent stock or the tool cannot reach safely.
Resolution
Verify the geometry and complete tool assembly, inspect the preceding result, then adjust the operation conservatively and recalculate.
• Problem: A feed control does not change the calculated or posted result.
Cause
• The control does not apply to the selected segment or the operation was not regenerated.
• The post or machine configuration changes the output feed.
Resolution
Identify the affected link, lead, or extension, regenerate, and inspect simulation and posted code. Confirm post behavior with CAMCO if needed.
• Problem: A Blade Finishing tool is rejected or causes a collision.
Cause
• The tool type is not supported for that operation or software build.
• Tool, holder, reach, or clearance data are incomplete or unsuitable.
Resolution
Confirm the supported tool type, define the complete assembly, and recalculate. Select a safer tool or revise the setup when clearance is insufficient.
Related Articles
• Recommended Simulation Settings
• How to Create a Pack and Go File
Explore More from CAMCO
Visit the CAMCO website to learn more about:
• Downloads and Helpful Resources
Keywords
GibbsCAM 2026, 5-Axis, Multiblade, Edge Finishing, Link Feedrate, Lead-in Feedrate, Lead-out Feedrate, edge extension, Blade Finishing, bullnose, end mill, taper tool
Was this article helpful?
That’s Great!
Thank you for your feedback
Sorry! We couldn't be helpful
Thank you for your feedback
Feedback sent
We appreciate your effort and will try to fix the article