Summary
GibbsCAM 2024 adds Tilt tool during helix to Adaptive Roughing ramp controls. When enabled, the tool vector stays normal to the current slice during the helical entry instead of remaining fixed.
Table of Contents
What Changed in GibbsCAM 2024
Important: Tilting changes rotary-axis motion during entry. Validate reach, travel, clearance, and posted motion before prove-out.
Before You Begin
• Use GibbsCAM 2024 with the required 5-Axis machining option and the approved machine definition and post.
• Configure an Adaptive Roughing operation with a valid helical entry region.
• Confirm the tool, holder, stickout, fixtures, and protected geometry.
• Save a baseline path with the approved ramp settings.
Procedure
Step 1 - Select Adaptive Roughing
1. Create or edit a Multiaxis Roughing operation.
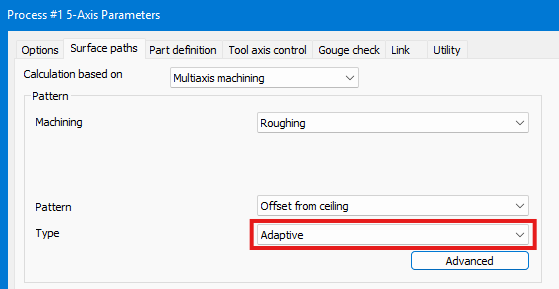
2. Set Type to Adaptive and confirm the machining and containment geometry.
3. Verify the active tool, holder, and machine configuration.
Step 2 - Configure the Helix Entry
1. Open Link > Ramps.
2. Set the approved ramp type, ramp angle, length, offset, and stock clearance values.
3. Confirm that the entry region can accommodate the helix.
Step 3 - Enable Tool Tilt
1. Enable Tilt tool during helix.
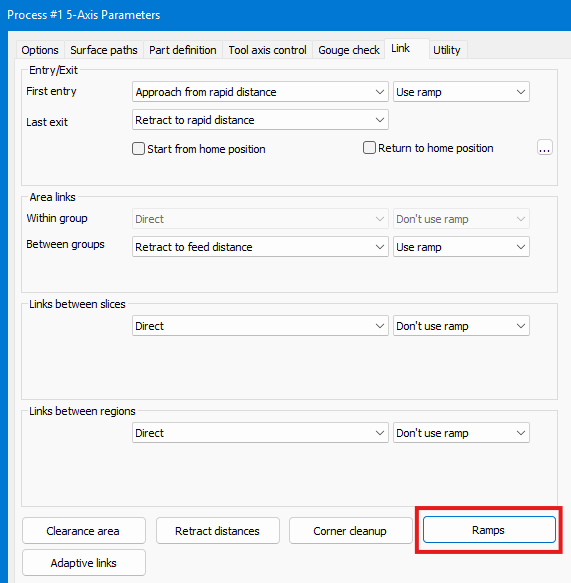
2. Recalculate the operation.
3. Display the tool axis and compare the helix entry with the saved baseline.
Step 4 - Validate the Entry Motion
1. Confirm that the tool remains normal to the current slice through the helix.
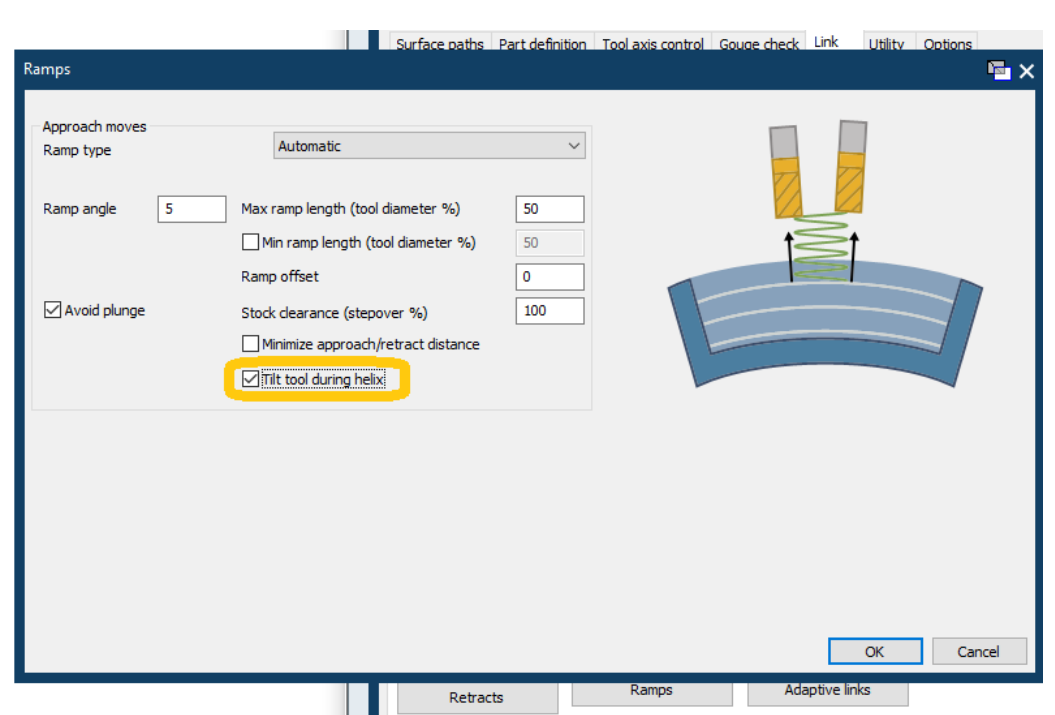
Figure 1 Adaptive roughing can keep the tool normal to the slice through the helical ramp
Source: What's New in GibbsCAM 2024, p. 30
2. Review engagement, holder clearance, rotary travel, and transitions into the cutting path.
3. Run Op Simulation and Machine Simulation, then review the posted rotary motion before prove-out.
Expected Result
• The helical entry uses a tool vector normal to the current Adaptive Roughing slice.
• The entry transitions smoothly into the cutting path without interference.
• Simulation and posted output show reachable rotary motion within machine limits.
Best Practices
• Compare the tilted and fixed-axis entries with the same geometry and ramp values.
• Use the complete physical tool and holder assembly during collision review.
• Inspect the full helix and the transition into cutting for abrupt rotary motion.
• Revalidate after changing the ramp, tool assembly, stock, machine definition, or containment.
Troubleshooting
• Problem: Tilt tool during helix is unavailable.
Cause
• The operation is not using Multiaxis Roughing with Type set to Adaptive.
• The GibbsCAM version or licensed option does not support the control.
Resolution
Confirm GibbsCAM 2024 and the required license, select Adaptive Roughing, and reopen Link > Ramps.
• Problem: The tool does not remain normal to the slice.
Cause
• Tilt tool during helix is disabled.
• The displayed path is stale or belongs to another operation.
Resolution
Enable the control, regenerate the operation, and display the tool axis while reviewing the current Adaptive Roughing path.
• Problem: The rotary motion is abrupt or unreachable.
Cause
• The tilted entry exceeds machine travel or approaches a singular orientation.
• Ramp geometry or tool-axis constraints are unsuitable for the setup.
Resolution
Stop release. Verify the machine definition and limits, adjust the approved entry or tool-axis controls, and simulate the complete motion again.
• Problem: The helix causes holder or fixture interference.
Cause
• The tool assembly, protected geometry, or clearance is incomplete.
• The entry region is too small for the programmed helix and tilt.
Resolution
Correct the assembly and collision geometry, increase the approved clearance or entry space, recalculate, and simulate before posting.
Related Articles
• Recommended Simulation Settings
• How to Create a Pack and Go File
Explore More from CAMCO
Visit the CAMCO website to learn more about:
• Downloads and Helpful Resources
Keywords
GibbsCAM 2024, Adaptive Roughing, Tilt tool during helix, helix entry, ramp, tool vector, tool axis, rotary motion
Was this article helpful?
That’s Great!
Thank you for your feedback
Sorry! We couldn't be helpful
Thank you for your feedback
Feedback sent
We appreciate your effort and will try to fix the article